









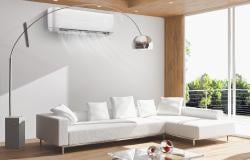





Choosing the correct size for your split system air conditioner is one of the most pivotal decisions you can make concerning home comfort and energy efficiency. A split system air conditioner, by definition, is an HVAC (Heating, Ventilation, and Air Conditioning) solution composed of an outdoor unit (the condenser) and one or more indoor units (the evaporators), which distribute cool air into living or working spaces. The term “split” refers to this separation between the outdoor and indoor components, allowing for flexible installation and targeted cooling solutions.
Many homeowners, landlords, and even some commercial building managers underestimate the importance of proper sizing. They might assume that “bigger is better” or that a smaller, cheaper system will be good enough. In reality, correct sizing is crucial both from a comfort perspective—ensuring your space stays at the desired temperature—and an economic perspective, because installing a system that is too large or too small can have long-term cost implications.
Moreover, you may have heard the phrase “load calculation” or references to “BTU capacity” without fully understanding what these terms entail. This guide aims to demystify the technical jargon and industry best practices so that you can approach your air conditioning purchase or upgrade with the confidence of someone who has done the homework.
In the chapters ahead, we’ll dive into everything from the science behind air conditioning to the practicalities of measuring your room and factoring in sunlight, insulation, and local climate. By the time you reach the end, you’ll not only know exactly how to calculate (or at least approximate) your cooling load, you’ll also be equipped with the knowledge to maintain, operate, and optimize your air conditioner for years to come.
1. Air Conditioning Basics: How It Works
Before we address sizing in depth, it’s crucial to understand the fundamental principles behind how an air conditioner functions. This knowledge lays the groundwork for appreciating why certain calculations and guidelines exist.
2.1 Terminology: BTUs, Tons, SEER, and More
BTU (British Thermal Unit): A BTU is a unit of energy. In HVAC terminology, BTUs measure how much heat an air conditioner can remove from a space per hour. For example, a 9,000 BTU air conditioner can remove 9,000 BTUs of heat in an hour.
Ton: In North America, cooling capacity is often referred to in tons. One ton of cooling equals 12,000 BTUs per hour. Hence, a 1.5-ton system is an 18,000 BTU system, a 2-ton system is 24,000 BTUs, and so forth.
SEER (Seasonal Energy Efficiency Ratio): This is a measure of an air conditioner’s cooling output (in BTU) over an average cooling season, divided by the total electric energy input (in watt-hours) during the same period. A higher SEER indicates better energy efficiency.
EER (Energy Efficiency Ratio): Similar to SEER, but typically measured at a specific outdoor temperature (usually 95°F or 35°C). EER gives you a snapshot of efficiency under standardized conditions.
COP (Coefficient of Performance): More commonly used in heat pumps to measure heating efficiency, but it can apply to cooling as well in some contexts. It’s a ratio of heat (or cooling) output to electrical energy input.
2.2 The Refrigeration Cycle
Central to air conditioning is the refrigeration cycle, which works by manipulating pressure and temperature to move heat from inside a building to the outside environment:
Evaporation: Low-pressure liquid refrigerant in the indoor evaporator coil absorbs heat from the indoor air, turning the refrigerant into a vapor and cooling the air.
Compression: The refrigerant vapor is then compressed by a compressor (located in the outdoor unit), raising its temperature significantly.
Condensation: The superheated refrigerant gas travels through the outdoor condenser coil, where the outside air absorbs its heat. The refrigerant condenses back into a high-pressure liquid.
Expansion: The high-pressure liquid refrigerant passes through an expansion valve, dropping its pressure and temperature before returning to the evaporator to repeat the cycle.
Understanding these steps helps clarify why correct sizing matters: the system’s capacity to move heat out of your space depends on both the physical size of these components and their design specifications. If your system is too small, it cannot absorb and remove enough heat in a timely manner. If it’s too large, it may short-cycle, leading to inefficiency and potential humidity issues.
3. Why Proper Sizing Matters
Sizing your air conditioner is not simply a question of picking any system that fits your budget. It’s a more nuanced process that, when done correctly, ensures comfort, cost savings, and system longevity.
3.1 Consequences of Undersizing
An undersized air conditioner struggles to meet the cooling demands of the space it serves. Signs of an undersized system include:
Inability to Reach Set Temperature: The system might run continuously without ever achieving the desired indoor temperature.
Excess Humidity: Because the unit is constantly running yet still can’t adequately dehumidify or cool, the indoor environment can feel clammy.
Higher Energy Bills: Running continuously at full tilt to try to meet a demand it can’t handle wastes energy.
Accelerated Wear and Tear: Components like the compressor can overwork, reducing the overall lifespan of the system.
3.2 Consequences of Oversizing
On the flip side, bigger isn’t always better. An oversized air conditioner might seem effective initially—because it cools the room quickly—but it introduces a new set of problems:
Short Cycling: The system rapidly cools the immediate air, shuts off, and then restarts again soon afterward as temperatures climb back up. This constant on-off cycle leads to inefficient energy use and increased wear on components.
Poor Humidity Control: Rapid cooling doesn’t give the system enough operating time to remove moisture effectively. You could end up with a space that is cold but still feels damp.
Inconsistent Temperatures: Some areas might cool faster than others, leading to uneven temperature distribution.
Higher Initial and Maintenance Costs: Larger-capacity units typically cost more upfront, and the frequent cycling can result in more repairs over time.
3.3 Balancing Cost, Efficiency, and Comfort
The sweet spot is a system that matches your home’s heat load almost exactly. This helps ensure:
Optimal Comfort: The system runs long enough to dehumidify and evenly cool your space.
Lower Energy Bills: Right-sized systems operate efficiently.
Increased Lifespan: Components are neither overburdened nor subjected to frequent short cycling.
Achieving this ideal balance can be done by performing a proper calculation or consulting with an HVAC professional who will conduct a Manual J load calculation (more on that later). Even if you can’t or don’t want to hire a professional, understanding the underlying principles and basic rules of thumb can get you surprisingly close to the correct sizing.
4. Factors Influencing Sizing
Now that we’ve established why correct sizing is so vital, let’s explore the multitude of factors that go into a sizing calculation. At a high level, you’re trying to assess the rate at which your space gains heat, since your air conditioner has to offset that heat gain to maintain a comfortable indoor temperature.
4.1 Room Dimensions
At the core of any sizing exercise is the physical dimension of the space being cooled. Generally, HVAC technicians look at floor area (length × width) and consider ceiling height.
Floor Area: A 150-square-foot bedroom obviously requires fewer BTUs than a 1,000-square-foot open-concept living space.
Ceiling Height: Standard calculations often assume 8-foot ceilings. If your ceilings are significantly higher—say 10 or 12 feet—the volume of air to be cooled increases, and so do the BTU requirements. A rough rule of thumb is adding about 10% capacity for each foot above 8 feet.
4.2 Climate and Geographic Location
The local climate plays a massive role in heat load:
Hot, Dry Climates: Locations like Arizona or parts of Australia, for instance, experience extremely high daytime temperatures and intense sunlight. Cooling loads spike in such conditions.
Hot, Humid Climates: States like Florida in the U.S. or tropical regions must deal with both high temperatures and high humidity. Air conditioners in these areas work harder to remove moisture from the air in addition to reducing the temperature.
Moderate or Cooler Climates: For temperate regions, you might need a smaller system or one that effectively handles occasional high temperatures but doesn’t have to combat scorching heat daily.
4.3 Insulation Levels
Insulation is your first line of defense against outdoor temperature extremes. A well-insulated room or building envelop helps slow the rate of heat transfer through walls, ceilings, and floors:
R-Value: This is a measure of how well a material resists heat flow. The higher the R-value, the better the insulating ability.
Windows and Doors: Inefficient windows or doors can let in a lot of heat, severely impacting your AC load. The type of windows (single-pane vs. double-pane vs. triple-pane) and the presence of thermal breaks can significantly affect sizing.
4.4 Windows, Orientation, and Glazing
Closely related to insulation is the role of windows and their orientation. A large glass window facing west in a hot climate can introduce massive heat gain during late afternoon or early evening:
Window Orientation: Windows that face east or west often let in more direct sunlight than north- or south-facing windows, depending on latitude.
Glazing: Low-E coatings, tinted windows, or double glazing can reduce solar heat gain.
Shading: Overhangs, awnings, blinds, or natural shade from trees can also mitigate the heat coming in through windows.
4.5 Occupancy and Activity
Every person in a room generates heat—on average, about 250–400 BTUs per hour per person, depending on level of activity. In a residential setting, you might factor in fewer people or occasional guests. In commercial or multi-use environments, occupancy might be consistently high, significantly adding to the cooling requirements.
4.6 Electronics and Equipment
Modern life is full of electronic devices: computers, TVs, gaming consoles, kitchen appliances, and more. All these devices generate heat. Even LED light bulbs, though far more efficient than older incandescent bulbs, still produce some heat. For heavily equipment-laden spaces—like a home office with multiple monitors, a server room, or a commercial kitchen—the heat gain can be substantial and should be factored into any sizing calculation.
4.7 Building Design, Layout, and Airflow
Open-concept layouts can demand different sizing strategies compared to multi-room structures with doors and hallways. The distribution of airflow—whether through ducts or via a single ductless unit—affects how well the cold air can travel throughout the space. High ceilings, lofts, or partial walls also influence how air circulates and can necessitate adjustments in overall capacity.
5. Rules of Thumb and Basic Calculations
While we strongly recommend a detailed approach (like a Manual J), many homeowners find it useful to start with some rules of thumb to get a ballpark estimate.
5.1 Approximate BTU Guidelines
For a typical home with 8-foot ceilings and average insulation, you might see suggestions like:
Small spaces (100–150 sq. ft.): 5,000–6,000 BTUs
150–250 sq. ft.: ~6,000–8,000 BTUs
250–350 sq. ft.: ~8,000–10,000 BTUs
350–450 sq. ft.: ~10,000–12,000 BTUs
450–550 sq. ft.: ~12,000–14,000 BTUs
These guidelines assume moderate climate conditions and minimal external factors like large south- or west-facing windows. If you live in a hotter climate, you might need to add 10–20% more BTUs. Conversely, in a cooler environment, you might subtract 10%.
5.2 Ceiling Height Adjustments
As previously mentioned, for each additional foot above 8 feet, you can add approximately 10% to the required capacity. For instance, if your standard recommendation for an 8-foot ceiling is 12,000 BTUs, but your ceilings are 10 feet high, you might need around 14,400 BTUs to adequately cool the same floor area.
5.3 The Role of Sun Exposure
Rooms that receive heavy direct sunlight throughout the day, especially in hot climates, can significantly drive up cooling loads. If your room has large, sun-facing windows, add 10–15% to the BTU requirement. If it is heavily shaded or faces north (in the northern hemisphere), you might reduce the requirement slightly.
6. Manual J Load Calculations: A Closer Look
For those who want a truly accurate number (or if you’re outfitting a large home or commercial space), a Manual J load calculation is the gold standard. Developed by the Air Conditioning Contractors of America (ACCA), Manual J is a methodology that precisely accounts for all the factors contributing to heat gain (and loss, for heating). While it can be somewhat time-consuming, the results are highly reliable.
6.1 What Is a Manual J Calculation?
A Manual J calculation is a detailed assessment of a building’s heating and cooling requirements. It involves:
Measuring Each Room: Length, width, and height, plus noting window and door dimensions and their specific orientations.
Evaluating Construction Materials: Walls, roof, flooring, insulation types, window U-values, and more.
Factoring in Local Climate Data: This includes design temperatures specific to your region (the outdoor temperature at which systems are designed to operate effectively, typically near the hottest average conditions in summer).
Accounting for Internal Loads: Number of occupants, appliances, lighting, and equipment.
Software is often used to input all these details, yielding a precise BTU requirement for each room, which can then be aggregated for the entire structure.
6.2 Components of a Manual J
Sensible Heat Load: The energy required to lower air temperature.
Latent Heat Load: The energy required to remove moisture from the air.
Ventilation and Infiltration: The load contributed by fresh air intake or air leaks.
Solar Loads: The heat gain from sunlight through windows.
Internal Loads: Heat generated by occupants, equipment, and appliances.
6.3 When to Consult a Professional
Manual J calculations are not overly complex, but they require meticulous data collection. If you’re unsure about your home’s insulation levels, window details, or infiltration rates, or if you prefer not to tackle specialized software on your own, it might be best to hire a professional. Most qualified HVAC contractors are trained to perform these calculations, or they use software tools specifically designed for this purpose.
7. Split System Air Conditioners: Overview
Once you have a handle on your cooling load, you’ll want to understand some specifics about split system air conditioners themselves.
7.1 Ducted vs. Ductless Split Systems
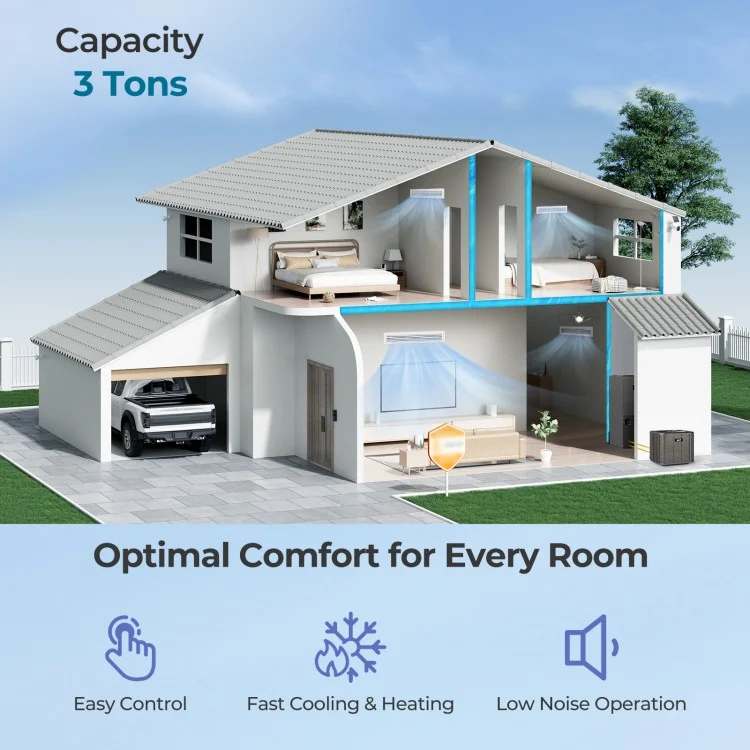
Ducted Split Systems: These systems use air ducts to distribute cool air throughout the space. They typically have a furnace or air handler inside connected to the outdoor condenser via refrigeration lines. This setup can be ideal for whole-house cooling or multi-room distribution, but installing or retrofitting ducts can be expensive if your home doesn’t already have them.
Ductless (Mini-Split) Systems: These systems use individual air handlers mounted on walls, ceilings, or floors. Each handler is connected to the outdoor unit with refrigerant lines and electrical wiring. Ductless systems are efficient, flexible, and perfect for spaces where installing new ductwork is impractical or too costly.
7.2 Multi-Zone vs. Single-Zone
A single-zone split system has one indoor unit paired with one outdoor unit, serving a single space. A multi-zone system, however, can have multiple indoor units connected to a single outdoor unit, each controlled independently. This zoning can be more efficient if you want different temperature settings in different parts of your home.
7.3 Indoor Unit Placement
For ductless systems, the placement of the indoor unit(s) can significantly impact performance. Placing units too high might mean the lower part of the room remains warmer. Conversely, placing them too low can reduce coverage. Strategically positioning units to maximize airflow—avoiding dead zones or obstructed corners—helps ensure consistent cooling.
7.4 Outdoor Unit Considerations
You’ll need space to place the outdoor unit (condenser) in a location where it can efficiently dissipate heat. Keeping it in an area with ample clearance around the coils and ensuring it’s not directly exposed to extreme elements (or blocked by debris) is crucial. Also, factor in noise considerations if you live close to neighbors or have local regulations on noise levels.
8. Energy Efficiency and Ratings
Energy efficiency should be a top consideration, especially with rising electricity costs and growing environmental concerns. An air conditioner’s efficiency rating provides insight into how effectively it converts electrical energy into cooling power.
8.1 Understanding SEER, EER, HSPF
SEER (Seasonal Energy Efficiency Ratio): The higher the SEER rating, the more efficient the unit. Modern systems often have SEER ratings above 13, and high-efficiency models can reach SEER 20 or higher.
EER (Energy Efficiency Ratio): Offers a more standardized snapshot of efficiency at a particular outdoor temperature (usually 95°F).
HSPF (Heating Seasonal Performance Factor): If you’re buying a heat pump (a system that provides both heating and cooling), HSPF measures the heating efficiency.
8.2 Impact of Efficiency on Sizing
While efficiency ratings don’t directly tell you the size of the system you need, they do affect how much energy you’ll use once the system is running. A unit with a higher SEER still needs to meet the BTU requirements for your space—efficiency pertains to how much electricity it consumes to deliver that cooling. In some cases, more efficient systems might be slightly more forgiving if your load calculation is borderline, but don’t rely on efficiency ratings to compensate for a grossly undersized or oversized unit.
8.3 Balancing Upfront Costs with Long-Term Savings
High-efficiency units typically come with a steeper upfront price tag. However, they can result in substantial long-term savings on your utility bills. Over the life of the system (often 10–15 years or more), a difference of a few SEER points can add up to significant financial savings. If you live in an area with very high electricity costs or extremely long cooling seasons, investing in a higher SEER system might pay for itself relatively quickly.
9. Case Studies and Examples
Concrete examples can clarify how sizing calculations and practical considerations come together.
9.1 Small Apartment Example
Scenario: A 500-square-foot studio apartment, 8-foot ceilings, moderate climate, medium sun exposure from east-facing windows.
Floor Area: 500 sq. ft.
Ceiling Height: 8 ft. (no additional adjustment)
Basic BTU Estimate: ~12,000 BTUs (based on standard 20–25 BTUs per square foot).
Sun Exposure Adjustment: East-facing windows with some shading might add ~10%.
Occupancy and Electronics: 1–2 people, minimal electronics (laptop, TV).
Final Estimate: ~13,200 BTUs (rounding up to 1.1 tons). A 1.0–1.5-ton system is likely sufficient.
9.2 Three-Bedroom House Example
Scenario: A 1,500-square-foot, single-story home with average insulation, 9-foot ceilings, and large west-facing windows in the living room. The climate is hot and dry in the summer, typically 95–100°F.
Base Calculation: 1,500 sq. ft. × ~20–25 BTUs/sq. ft. = 30,000–37,500 BTUs.
Ceiling Height: 9 ft. (1 foot above standard). Add ~10%: 33,000–41,250 BTUs.
West-Facing Windows: Large windows with minimal shading. Add ~10–15%: ~36,300–47,438 BTUs.
Occupancy: 4 people, each adding ~300 BTUs/hr. That’s an extra 1,200 BTUs total, which might nudge you to ~37,500–48,638 BTUs.
Rounding: You might end up with ~3 to 4 tons (36,000 to 48,000 BTUs). A 3.5-ton (42,000 BTU) system could be a good fit. For extra margin, a 4-ton system might be considered, but a precise Manual J is recommended to avoid potential oversizing.
9.3 Commercial Office Example
Scenario: A 2,500-square-foot open office space, well-insulated, with efficient double-glazed windows. Occupancy: 10–12 employees, plus computers, printers, and other office equipment.
Base Calculation: 2,500 sq. ft. × ~20–25 BTUs/sq. ft. = 50,000–62,500 BTUs.
Good Insulation: Possibly reduce load by ~5%.
Ceiling Height: Standard 8 ft. in an office setting (no additional factor).
Occupancy Load: 10–12 people, each adding up to 300–400 BTUs. That’s an extra 3,000–4,800 BTUs.
Electronics: 10–12 computers, each adding ~300 BTUs, plus printers or other equipment. Might add another 3,000–4,000 BTUs.
Total: Could approach 60,000–70,000 BTUs. That’s about 5 to 6 tons of cooling. Professional load calculations would refine this further, potentially factoring in lighting, ventilation, and infiltration loads.
10. Installation Considerations
Having identified a suitable capacity, the next crucial step is proper installation. Even the best equipment can perform poorly if installed incorrectly.
10.1 Finding a Qualified Installer
Ensure your installer:
Holds the necessary licenses and certifications.
Has experience with the specific brand and type of system you choose.
Provides references or testimonials from past clients.
10.2 Proper Siting for Indoor and Outdoor Units
Indoor Unit Placement: For ductless systems, choose a wall with good central access for airflow. Avoid placing the indoor unit near sources of heat or large obstructions like tall furniture.
Outdoor Unit: Place in a well-ventilated area, ideally with some shade but not so enclosed that airflow is restricted. Keep it clear of debris, vegetation, or walls that obstruct airflow.
10.3 Ensuring Adequate Airflow
Ducted systems require well-sealed and properly sized ducts. If the ducts are too small, the system will be noisy and inefficient. If they are too large, airflow velocity can drop, potentially affecting cooling distribution. In mini-split systems, the length and routing of refrigerant lines also matter to maintain efficiency.
10.4 Common Installation Pitfalls
Refrigerant Charge Issues: If the system is under- or overcharged with refrigerant, you’ll see reduced efficiency or even damage to the compressor.
Electrical Considerations: The electrical circuit must match the unit’s specifications. Undersized wiring or incorrect breaker size can lead to tripped breakers or fire hazards.
Drainage: Improper condensate drain installation can lead to water leaks and mold issues.
11. Maintenance and Operation Tips
A well-maintained system not only performs better but also can slightly cushion sizing miscalculations. Properly cleaning and servicing your AC ensures it operates at its designed capacity.
11.1 Regular Filter Replacement and Cleaning
Clogged filters reduce airflow and force the system to work harder. Check and replace (or clean, if it’s a reusable filter) every 1–3 months, or more frequently if you have pets or live in a dusty environment.
11.2 Checking Refrigerant Levels
Low refrigerant can indicate a leak. This reduces cooling capacity and forces the system to run longer. Periodic checks by a qualified technician help catch issues early, maintaining both efficiency and comfort.
11.3 Seasonal Maintenance Checklist
Spring: Inspect outdoor condenser coils and remove any debris. Test the system before peak cooling season arrives.
Summer: Monitor indoor humidity levels. Check drainage lines.
Fall: If you have a heat pump, transition to heating mode and make sure everything functions correctly.
Winter: In warmer climates, an air conditioner might still be used occasionally. Keep the outdoor unit clear of snow or ice (if applicable).
12. Common Mistakes and How to Avoid Them
Even armed with all this information, it’s easy to stumble into pitfalls. Here are some frequent missteps:
12.1 Relying Solely on Nameplate Data
Some homeowners choose a system based on the old unit’s capacity or guess that a “2-ton” or “3-ton” unit is standard without any real calculation. But your home’s insulation might have changed, or you could have replaced windows. Always do a fresh assessment.
12.2 Ignoring Climate Variations
A rule-of-thumb calculation that works in a mild climate might be woefully inadequate in the scorching heat of a desert region. Always factor in your local design temperature when sizing.
12.3 Overlooking Insulation Improvements
If you plan to upgrade insulation, seal leaks, or replace windows with more energy-efficient models, factor that into your sizing. Some people install a large system, then a year later make insulation upgrades and find their AC is now too big.
12.4 Skipping Professional Assessments
While DIY calculations and rules of thumb are useful starting points, for best results—especially in larger or complex projects—consult a professional for a precise load calculation and expert advice on installation nuances.
13. Conclusion and Final Thoughts
Determining the correct size for your split system air conditioner involves understanding a broad range of factors. Room dimensions, insulation, sun exposure, occupancy, climate, and equipment loads all play a part in calculating your space’s cooling requirements. Getting this calculation right is crucial for maintaining comfort, reducing energy bills, and extending the lifespan of your AC system.
Here’s a brief recap of the key takeaways:
Know Your Room Dimensions: Calculate the square footage (or square meters) and assess ceiling height.
Factor In Climate: Local temperature extremes will heavily influence the required capacity.
Don’t Overlook Insulation: Insulation type and window efficiency can drastically change BTU requirements.
Consider Occupancy and Electronics: People and devices add extra heat that must be offset.
Consult a Professional: For the most accurate results, especially for complex or large-scale projects, a Manual J calculation is the best route.
Don’t Oversize or Undersize: Both extremes lead to inefficient operation, higher costs, and reduced comfort.
Remember Maintenance: Even a perfectly sized system performs suboptimally without regular care.
Choosing a split system air conditioner is more than simply picking a brand or a cooling capacity at random. It’s a thoughtful process that balances immediate comfort needs, future energy costs, and the unique architectural and environmental features of your home or business. By investing the time—or hiring a qualified HVAC professional to do so—you’ll be rewarded with a system that keeps you perfectly cool for many summers to come.