


 Portable Air Conditioner with Dehumidifier Function")
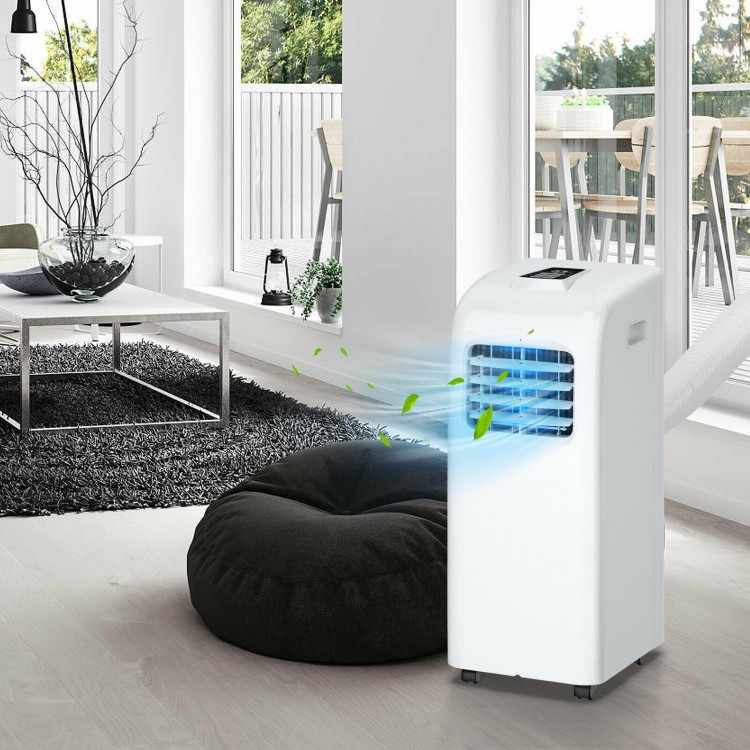
8000 BTU Portable Air Conditioner with Dehumidifier Function
Key Features
● Multiple Function Modes: This portable air conditioner offers cooling, dehumidifying, fanning, and sleeping mode to meet the various needs of users. This air conditioner will automatically lower down the working noise to under 52dB once it is set to sleeping mode. This feature allows maintaining the temperature while sleeping.
● Convertible Fan Speed and All-day Timer: There are 2 speeds in fan mode, you can switch between high and low speed as you wish. There is an energy-saving 24-hour programmable timer, allowing the air conditioner unit to shut down automatically once reaching the usage time.
● Strong Air Flow Rate and Wide Coverage: The compact 8000BTU/H air conditioner unit delivers fast and effective cooling for spaces up to 230 sq. ft. You can use it in your home, office, cabin or camper. It comes with a strong airflow rate of 300m3/h that ensures quality air circulation while replacing the stale air with the outdoor fresh air in a few minutes.
● Water-Full Warning and Long Drain Hose: Among various protection functions, this unit is designed with a water-full control and warning feature, keeping your floors or carpets from getting wet. The drain hose has a length of 10ft that allows you to drain the water in the bathroom easily.
● Easy Moving Casters and Remote Control: There are four all-direction casters that allow you to move it easily from one place to another. Also, this air conditioner features a modern design that everyone loves and remote control, which allows you to set it up easily.
Before You Start
● Please read all instructions carefully
● Retain instructions for future reference.
● Separate and count all parts and hardware.
● Read through each step carefully and follow the proper order.
● We recommend that, where possible, all items are assembled near to the area in which they will be placed in use, to avoid moving the product unnecessarily once assembled.
● Always place the product on a flat, steady and stable surface.
● Keep all small parts and packaging materials for this product away from babies and children as they potentially pose a serious choking hazard.
This user manual will provide you with valuable information you need for the proper care and maintenance of your new product. Please take a few moments to thoroughly read the instructions and familiarize yourself with all the operational aspects of your new Portable Air Conditioner.
AIR CONDITIONER SAFETY
Your safety and the safety of others are very important
We have provided many important safety messages in this manual and on your appliance. Always read and obey all safety messages.

DANGER : An imminently hazardous situation. You could be killed or seriously injured if you don’t immediately follow instructions.
WARNING : A potentially hazardous situation which, if not avoided, could result in death or serious bodily injury.
CAUTION : A potentially hazardous situation which, if not avoided, may result in moderate or minor injury.
All safety messages will tell you what the potential hazard is, tell you how to reduce the chance of injury, and tell you what can happen if the instructions are not followed.
IMPORTANT SAFETY INSTRUCTIONS

WARNING: To reduce the risk of fire, electrical shock, injury to persons, or damage when using the air conditioner, follow basic precautions, including the followings:
• Appliance shall be stored in a well-ventilated area where the room size is not less than 43 sq.ft(4m²)
• Read all of the instructions before using this appliance.
• Plug into a grounded 3 prong outlet.
• Do not remove the ground prong.
• Do not use an adapter.
• Do not use an extension cord.
• Do not operate the air conditioner if it has a damaged cord or plug, if it is not working properly, or if it has been damaged or dropped.
• The air conditioner should be serviced only by qualified service personnel. Consult a qualified technician for examination, repair, or adjustment.
• Disconnect power before servicing.
• Disconnect power before cleaning.
NOTE: Turning off power by pressing the Power button does NOT disconnect the appliance from the power supply.
• Do not install or use the air conditioner in an area where the atmosphere contains combustible gases or where the atmosphere is ontaminated. Avoid any chemicals coming in contact with your air conditioner.
• Do not place anything directly on top of the air onditioner.
• The appliance can be used by children aged rom 8 years and above and persons with reduced physical, sensory or mental capabilities if they have been given supervision or instruction concerning use of the appliance in a safe way and understand the hazards involved Children shall not play with the appliance.
Cleaning and maintenance shall not be made by children without supervision.
• This appliance is not intended for people (including children) with reduced physical, sensory or mental capabilities or lack of experience and knowledge, unless they have been given supervision or instruction oncerning use of the appliance by a person responsible for their safety. Children should be supervised to ensure that they do not play with the appliance.
• Two or more people are needed o move and install air conditioner.
• Never operate the air conditioner without the filters in place.
• Do not use the air conditioner near a bathtub, shower or wash basin or other wet area.
• Do no use means to accelerate the defrosting process or to clean other than those recommended by the manufacturer.
• The appliance shall be stored in a room without continuously operating ignition source (for example open flames, an operating gas appliance or an operating electric heater Do no pierce or burn.
• Be aware ha refrigerants may not contain an odor.
–the maximum refrigeran charge amount: 6.4Oz
• The appliance shall be stored so as to preven mechanical damage rom occurring.
• Any person who is involved with working on or breaking into a refrigeran circuit should hold a current valid certificate from an industry-accredited assessmen authority which authorizes their competence to handle refrigerants safely in accordance with an industry recognized assessmen specification.
Servicing shall only be performed as recommended by the equipment manufacturer Maintenance and repair requiring the assistance of other skilled personnel and shall be carried out under he supervision of he person competen in the use of flammable refrigerants.
• Prior to beginning work on systems containing lammable refrigeran safety checks are necessary to ensure that the riss of ignition is minimized. Work shall be undertaken under a controlled procedure so as to minimize the risk of a flammable gas or vapor being present while he work is being performed.
All maintenance staff and others working in he local area shall be instructed on he nature of work being carried out.
Work in confined spaces shall be avoided. The area around the workspace hall be sectioned of Ensure that the condition within he area have been made safe by control of flammable material.
PARTS AND FEATURES

1.Control panel
2.Vertical louvers
3.Horizontal louvers
4.Horizontal louvers connecting rod
5.Air outlet frame
6.Front shell
7.Universal wheel
8.Back shell
9.Central connecting rod
10.Vertical louvers connecting rod
11.Main vertical louver
12.Upper filter
13.Upper drain hole and plug
14.Power cord storage
15.Lower filter
16.Lower drain hole and plug
17.Handle
18.Air discharge and protective vent
19.Chassis
20.Remote control
21.Exhaust hose assembly
22.Exhaust hose adapter
23.Window kits
24.Window kits screw(butterfly nut)
INSTALLATION REQUIREMENTS
TOOLS AND PARTS
Gather the required tools and parts before starting installation.
TOOLS NEEDED
•Flat-blade Screwdriver
•Phillips Screwdriver
LOCATION REQUIREMENTS
Place the air conditioner on a flat, level surface in a location that is at least 19.7inches(50cm) from any wall.
NOTE: A minimum clearance of 19.7inches(50cm) from the air conditioner to the wall must be maintained to ensure proper airflow.
Maintain a minimum 19.7inches(50cm) clearance around the air conditioner to not block airflow.
Keep the air conditioner free of any obstructions such as drapes, curtains, blinds, etc.
The exhaust hose should be free of any obstructions.
Do not place the air conditioner on an unstable or raised surface because it could fall and cause damage or injury.
Do not place the air conditioner in direct sunlight or near a heat source such as baseboard heaters, stoves, etc.
The window panel can be installed in a window with a minimum 19.7 inches(50cm) to a maximum 40.2 inches(102cm) opening.

ELECTRICAL REQUIREMENTS

POWER SUPPLY CORD
Wiring Requirements
• 115 Volt, 60Hz, 15-amp fused grounded 3 prong outlet
• The use of a time-delay fuse or time-delay circuit breaker is recommended.
• Use a dedicated circuit only.
NOTE: Do not operate any other electrical appliances on this circuit or you may trip the circuit breaker/fuse.
If this power supply cord is damaged, it cannot be repaired. It must be replaced with a cord from the product manufacturer.
If the power supply cord is damaged, please contact Customer Service.
To test the power supply cord before operation:

1. Plug the power cord into a grounded 3 prong outlet.
2. Press the Test button, and then press and release the Reset button to restore power
REQUIRED GROUNDING METHOD

This air conditioner must be grounded.
The air conditioner is equipped with a power supply cord that has a 3 prong grounding plug.
The power supply cord must be plugged into a mating, grounded 3 prong outlet, and grounded in accordance with all local codes and ordinances.
INSTALLATION INSTRUCTIONS
STEP 1 - UNPACK AIR CONDITIONER

Remove packaging materials. Save the carton and the foam packaging for storing the air conditioner when not in use.
NOTE: There are NO packing materials inside the air conditioner to remove—Do Not open the cabinet.
Properly dispose of/recycle all packing materials.
Handle the air conditioner gently.
Keep the air conditioner upright and level. Do not set the air conditioner on its side, front, back or upside down.
STEP 2 - TWIST THE EXHAUST HOSE CONNECTOR ONTO EXHAUST HOSE
A. Grasp both ends of the exhaust hose and gently pull to expand the hose.
NOTE: Do not attach additional hoses to extend the length. This would decrease cooling efficiency and may damage the air conditioner.
B. Using a counterclockwise motion, attach the open end of the exhaust hose to the exhaust nozzle.

STEP 3 - CONNECT EXHAUST HOSE TO THE AIR CONDITIONER
IMPORTANT: When connecting the hose, the air conditioner must be close enough to the window that you will not dislodge the window seal plate. Once the hose is connected, move the air conditioner 20” (51 cm) from the wall.

A. Take two ends of exhaust hose and its adapter assembly (as Photo).
B. Put front end of exhaust hose assembly onto jugged position of exhaust outlet of back panel(as Photo).
C. Hold the unit by one hand, carry the exhaust hose assembly with another hand and push it into unit gently, for good locking of two parts.(as Photo)
Remarks:

Keep the right direction of slant side A of adapter, for ease installation of window seal-plate.
Keep the exhaust hose assembly be strongly locked by fasteners in exhaust outlet to avoid its fall off.
STEP 4 - INSTALL WINDOW PANELS
Depending on the size of your window opening, use the main panel and one or both of the extension panels.
A. Open the window and place the main window panel into the window.
NOTE: The window assembly is designed to accommodate either a vertical slide or horizontal slide window.

B. Take out the butterfly nut from the user manual’s bag, and disassemble the screws in the following directions.

C. Lock the butterfly nut on panel A, and do not lock the butterfly nut tightly, keeping the spacing of 0.01inch(2.5mm).

D. Connect with panel B, adjust the panel(s) to the width or height of the window as shown.

E. Fasten the butterfly nut to fix the window slide set.

STEP 5 - COMPLETE INSTALLATION
Close the window as far as the window slide set, so this covers the window opening completely. Place the device at least 19.7inches(50cm) away from walls and other objects.

NOTE:
Some window installations may require the extension panels to be trimmed.
Slide the adapter downwards and assure adapter installed in good position.
Assure the slant panel direction to match seal-plate direction.
Exhaust hose cannot be bent or with flexure higher than 45°, in order to keep good ventilation of exhaust hose.

1.Plug the power cord into a grounded 3 prong outlet.
2.Press the Reset button on the power cord to ensure the safety
plug is providing power to the air conditioner.